How to use the DHT22 Sensor with an ESP32 and a MicroPython script?
(Updated at 01/04/2023)
The DHT22 is an improved version of the popular DHT11 sensor for DIY projects. It offers superior accuracy but has the identical drawback: it takes few measurements per second: only 1 every 2 seconds. Despite this, it may be suitable for creating a DIY IoT weather station.
Note
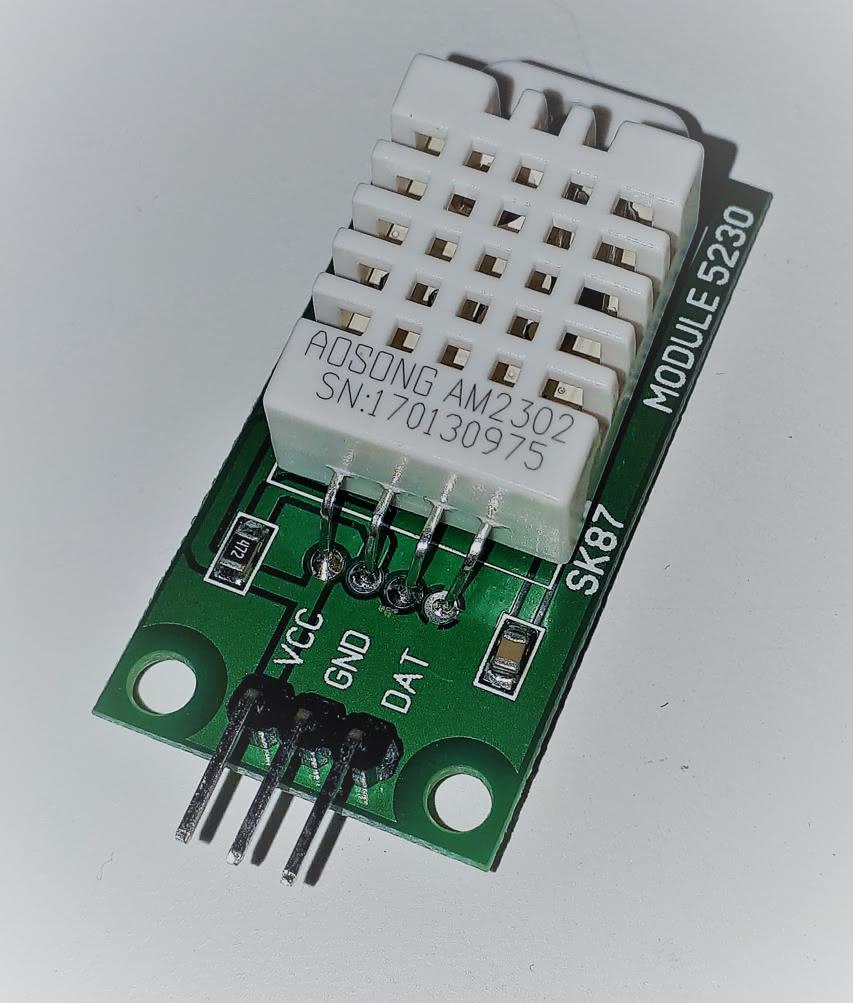
The DHT22 , also known as AM2302.
Getting started with the DHT22 sensor
Some characteristics of the DHT22 sensor
Note
The DHT22 is a better option than the DHT11 for outdoor temperature measurements since it can handle temperatures as low as -40°C. While it provides basic performance, it is not as dependable as Bosh’s BMExxx sensors. Ultimately, it depends on your particular needs.
Connections of the DHT22 sensor
The DHT22 is a module with between 3 and 4 pins. It usually contains 4 pins, though one may not be utilized. Depending on the module, only 3 pins may be visible.
When connecting a sensor module, it is crucial to know that the pins’ order may differ based on the manufacturer. To properly determine the order of the pins, hold the module, so the grid is facing you, and the numbering will start from the left. It should be noted that the power pin is always the first one, and the other pins may vary.
The DHT22 has only one data pin outside its power supply (One Wire Protocol).
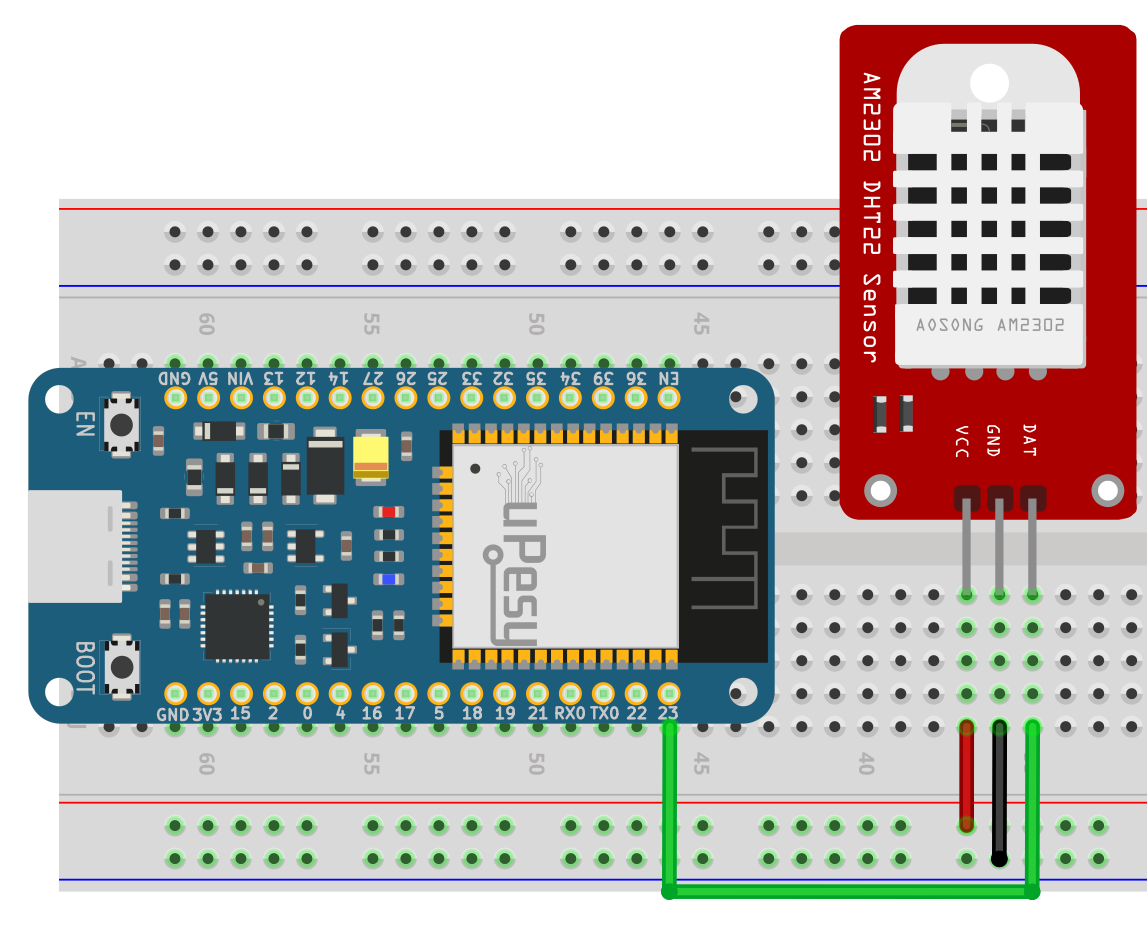
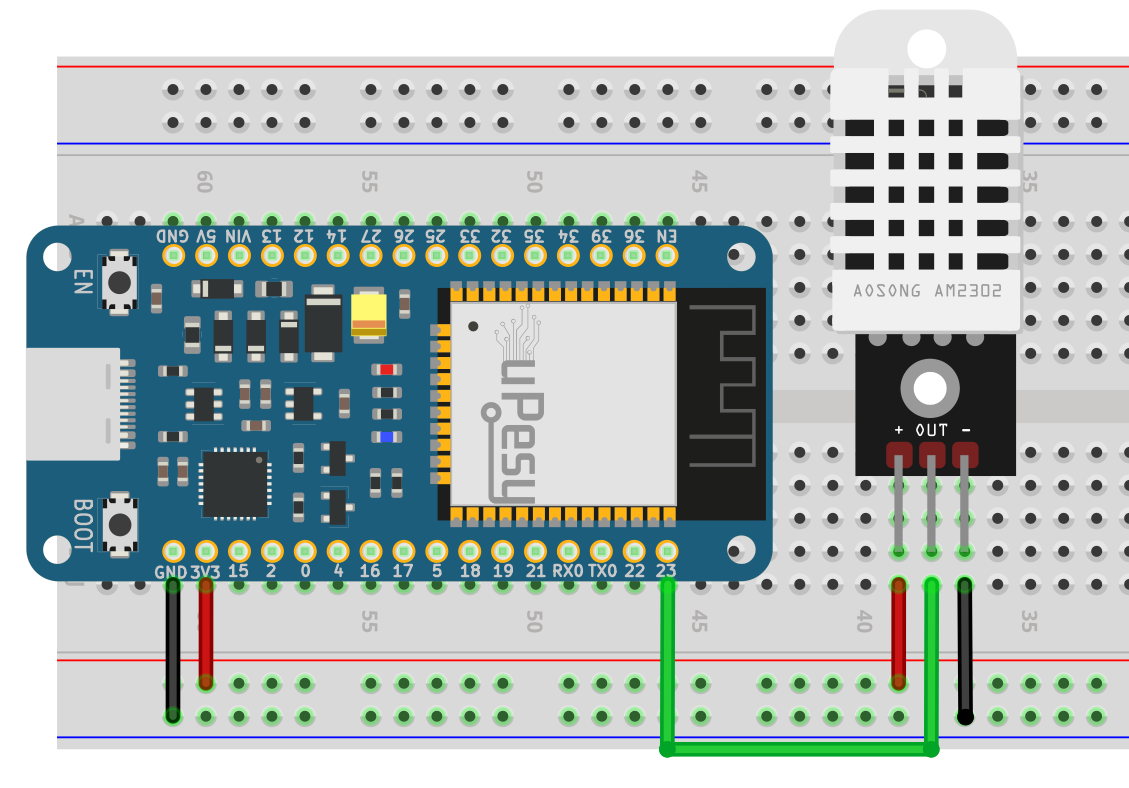
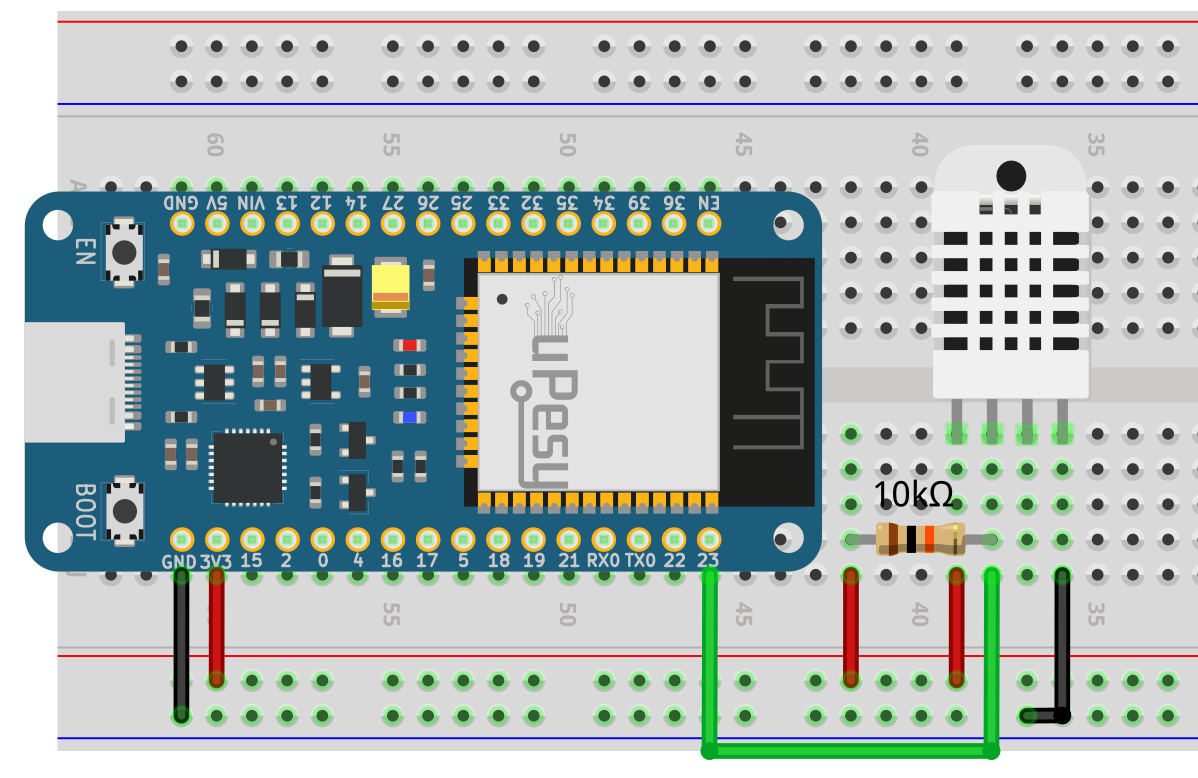
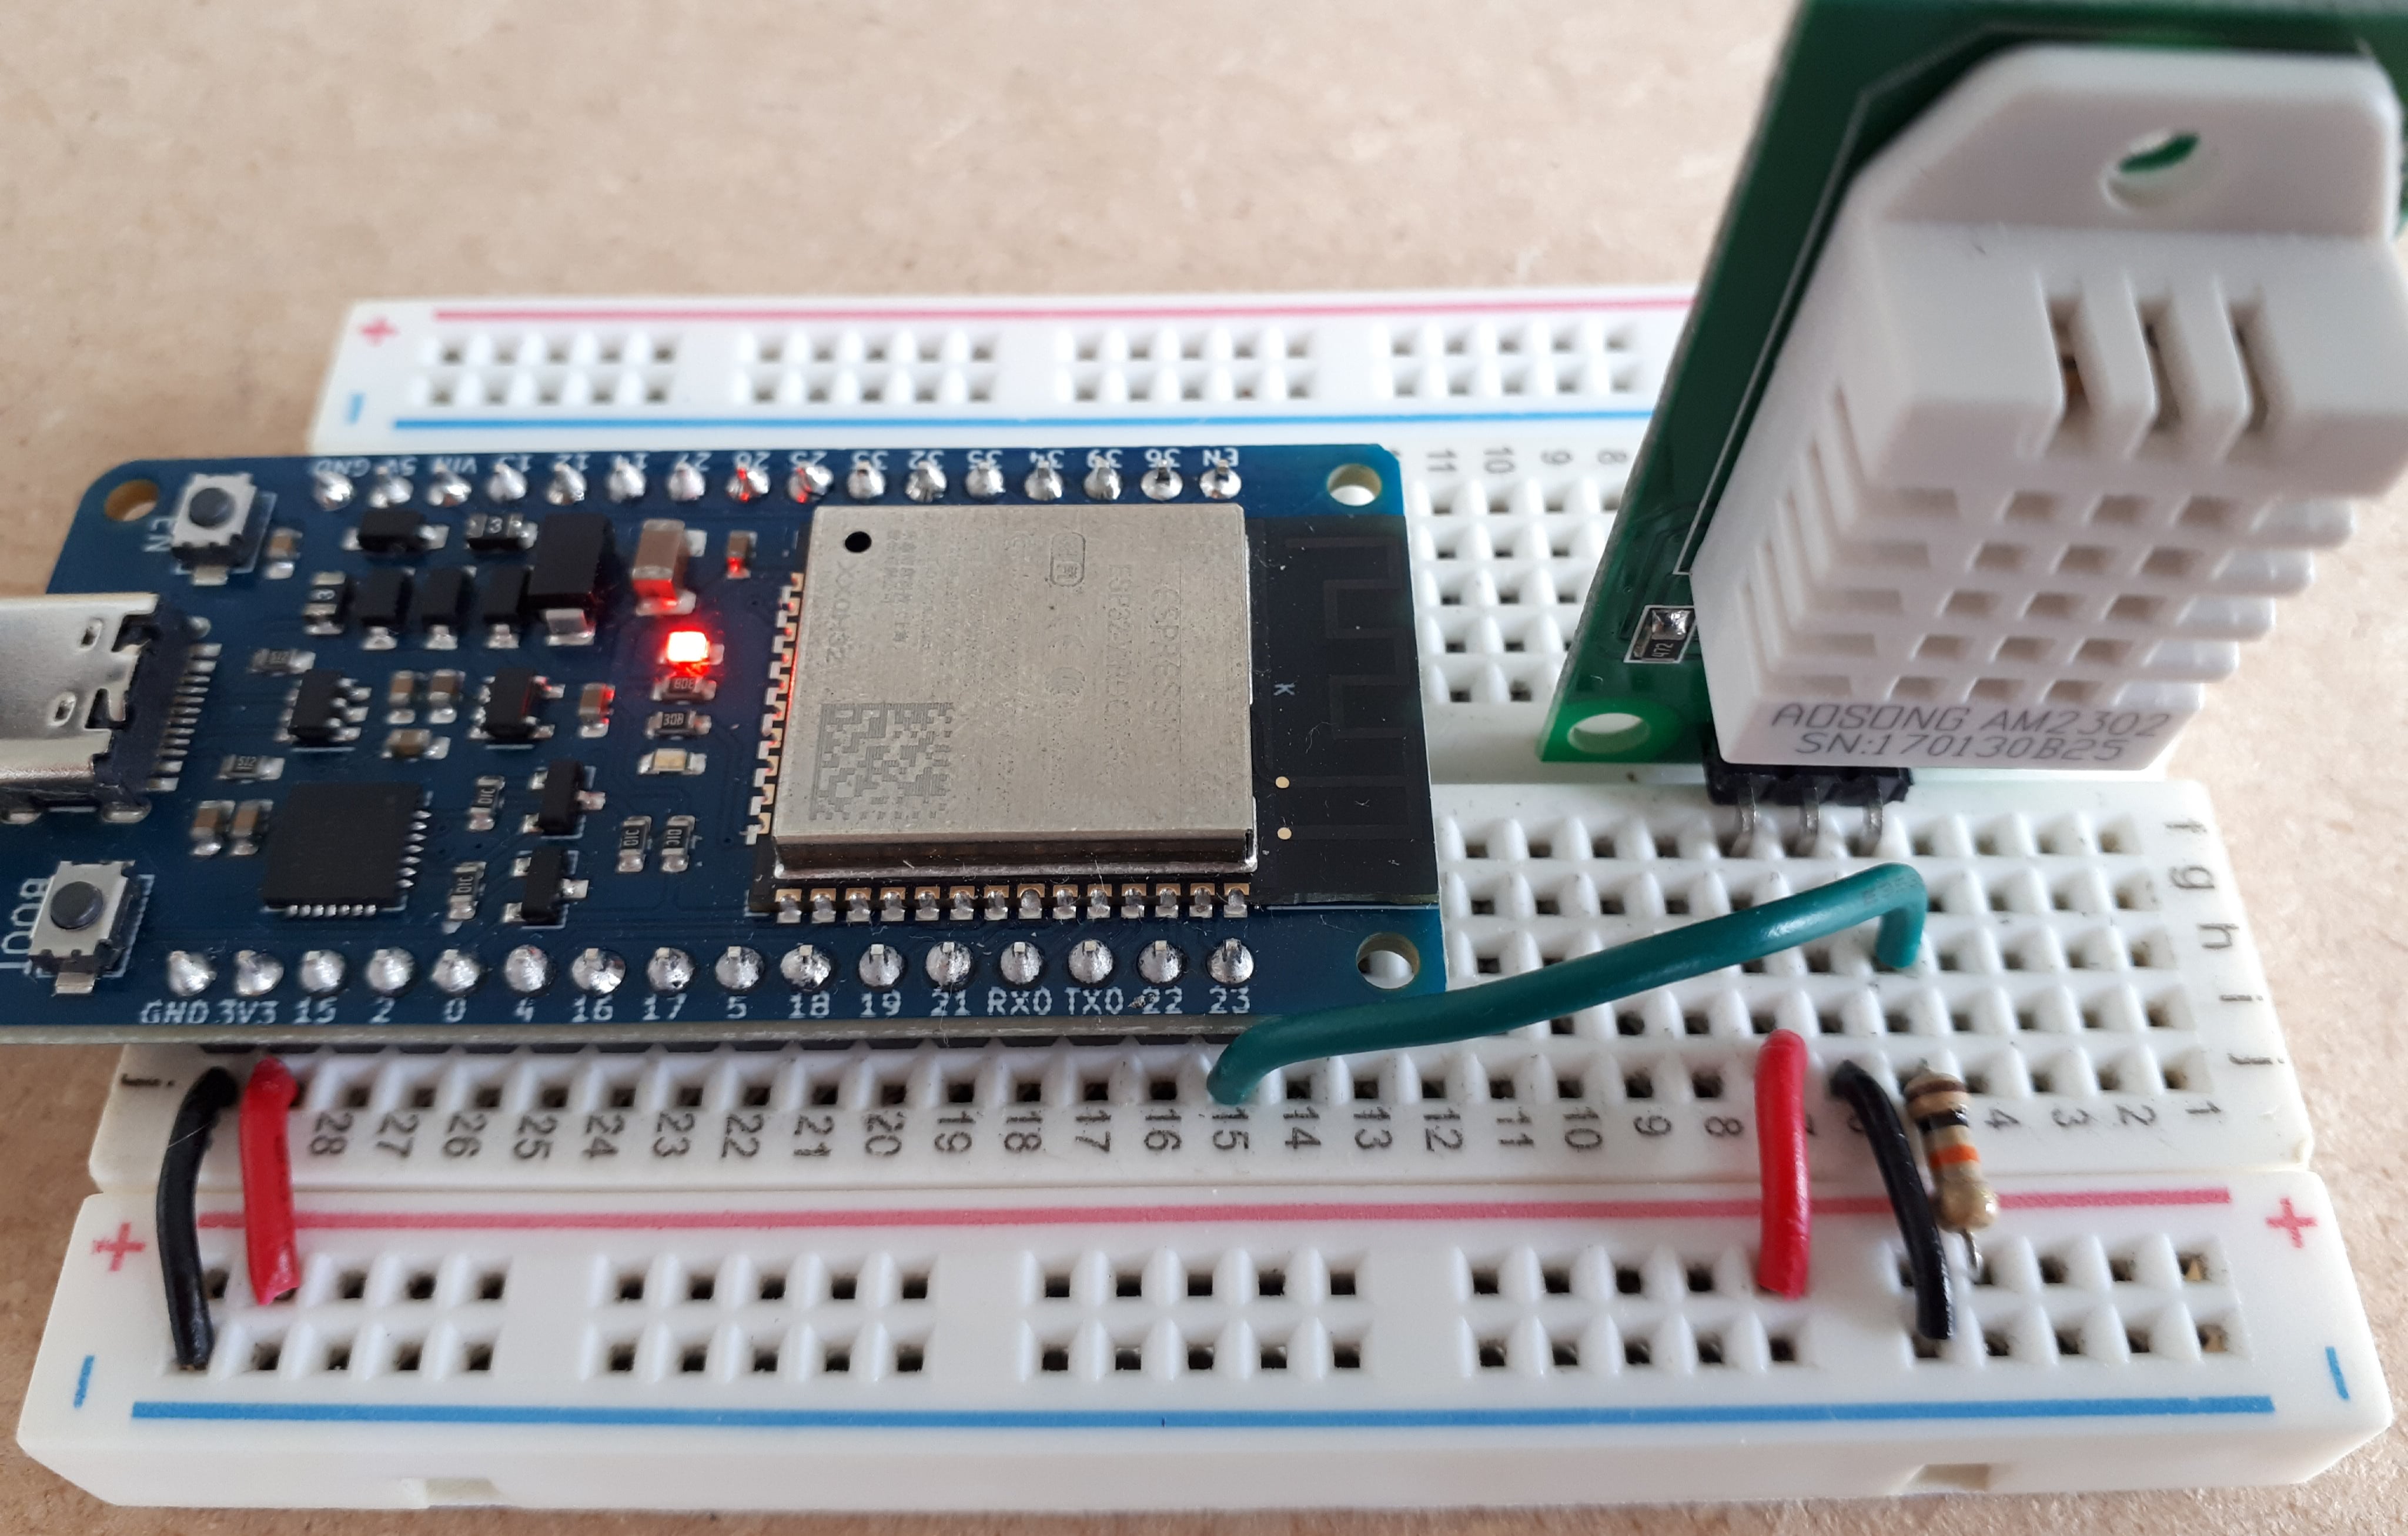
Wiring diagram for using the DHT22 module with an ESP32
If your module does not have a pull-up resistor, you must add one between 4.7kΩ and 10kΩ between the 3V3 pin and the signal (GPIO23 ). Any output pin can be used on the ESP32, and here we will use the GPIO23 . Don’t forget to modify the circuit according to your model if it is slightly different.
Here is an example of a circuit for the first type of DHT22 module:
Measuring the temperature and humidity on the DHT22 with MicroPython
Utilizing the DHT22 requires a specific protocol, so it is essential to use a library to communicate with the sensor. Fortunately, no additional downloads are necessary as the library is included in the most recent versions of MicroPython. You can quickly import the module using the import dht command.
from machine import Pin
from time import sleep
import dht

sensor = dht.DHT22(Pin(23))

while True:
  try:
    sleep(1)     # the DHT22 returns at most 1 measurement every 2s
    sensor.measure()     # Recovers measurements from the sensor
    print(f"Temperature : {sensor.temperature():.1f}°C")
    print(f"Humidite    : {sensor.humidity():.1f}%")
  except OSError as e:
    print("Failed reception")
In the Thonny IDE terminal, you will see the temperature in °C and the humidity in percentage:
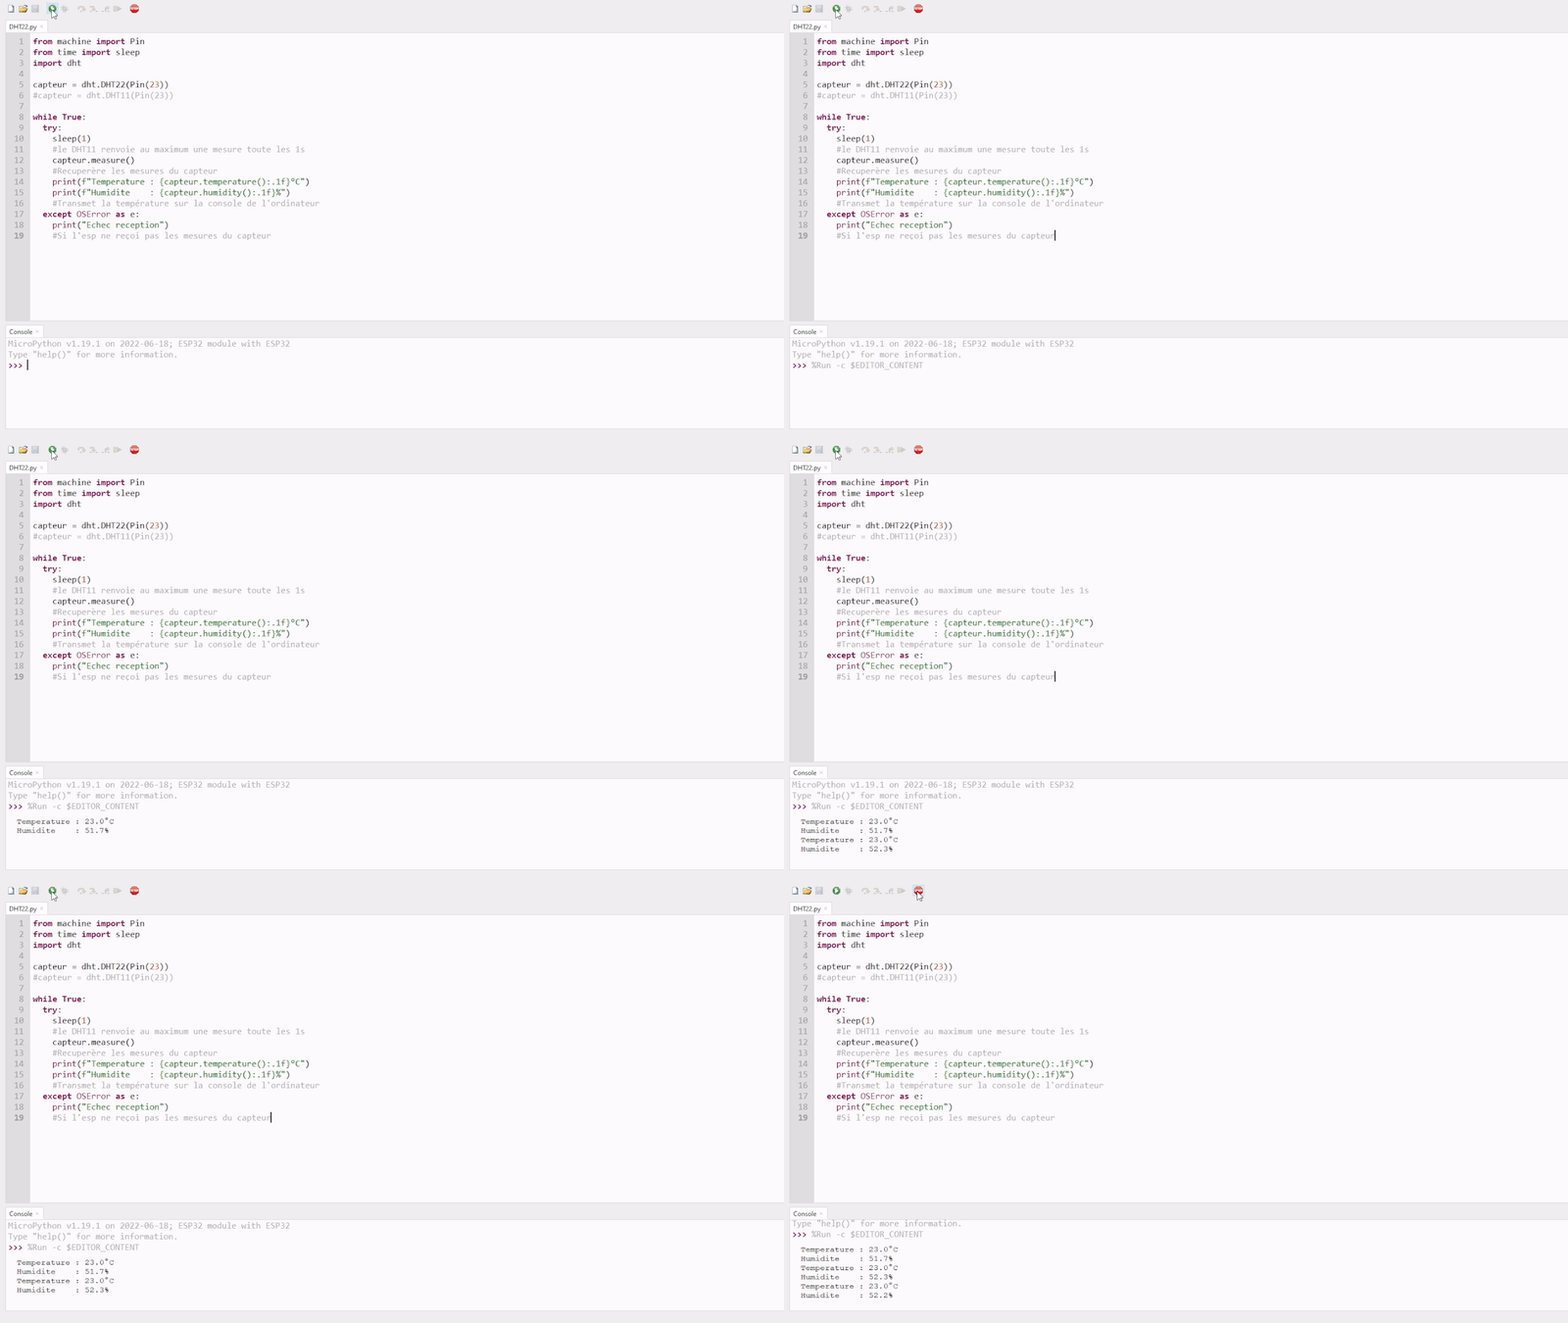
In Python, you can use an f-string to display variables with text. This starts with an f , and the variable must be enclosed in square brackets. You can also specify the number of decimal places to be displayed by adding :.1f . For example, f"Humidite: {sensor.humidity():.1f}" will display a number after the decimal point because the sensor is accurate within 0.5°C.
Calculate the heat index | Felt air temperature
The heat index is a way to measure the temperature. This value, expressed in °C, considers the temperature and the amount of moisture in the air. When the air is more humid, it feels hotter than the temperature indicates.
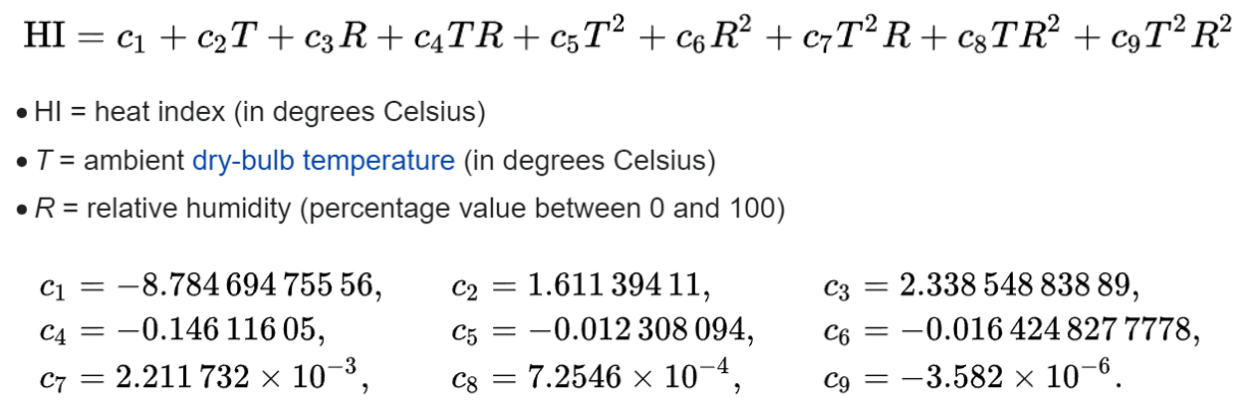
Although the calculation formula is complex, I have provided a ready-to-use function that displays the result in the console. 😉
from machine
This section is available to premium members only. You still have 68% to discover.
Subscribe for only 5$/monthAlready subscribed? Sign in
