
DHT11: Measuring temperature and humidity with the ESP32 in Arduino code
(Updated at 01/04/2023)
The DHT11 sensor is a trendy temperature and humidity sensor in the Makers and DIY world. Its low price and ease of use have given it this success.
Warning
The fact that you can only get one measurement per second is its main drawback. It will be perfectly suitable for making a DIY IoT weather station. 🙂
Getting started with the DHT11 sensor
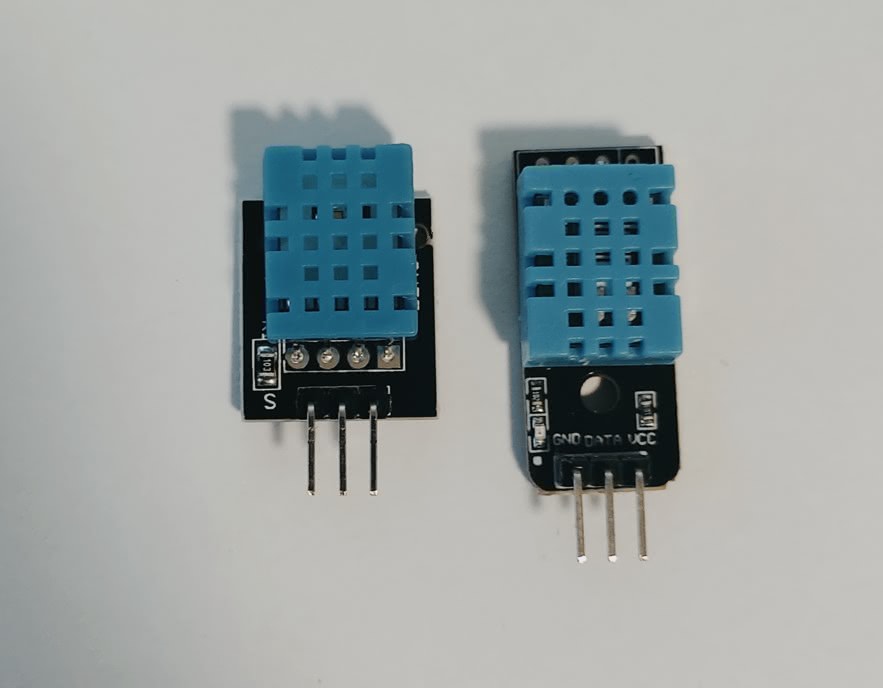
A higher-end model, the DHT 22, is more complete. To differentiate them, we can look at the colors of their housing: the DHT11 has blue housing while the DHT22 is white. The DHT22 is also slightly bigger. Apart from their differences, they are used in the same way. Please compare DHT11 and DHT22 sensors to learn more about the differences.
Some technical characteristics of the DHT11
The DHT11 can be directly powered by 3.3V.
Features |
DHT11 |
|---|---|
Temperature accuracy |
± 2°C |
Humidity accuracy |
± 5% |
Temperature range |
0-50 °C |
Humidity range |
20-90% |
Sampling |
1/s |
Supply voltage |
3-5.5V |
Current consumption |
~2.5mA |
The performances are simple, which limits the use of the sensor. I advise you to use a sensor of the BMExxx series of the manufacturer Bosh for better measurements.
DHT11 Sensor Wiring on ESP32
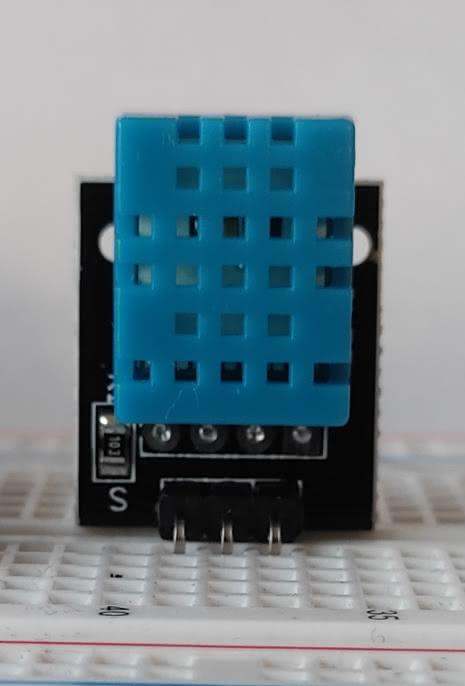
The DHT 11 sensor has between 3 and 4 pins. Depending on your module on the 4-pin model, one pin is useless. Unfortunately, different pin-outs rely on the module manufacturer. Here is a summary of the other possibilities:
The numbering is done from the left when you hold the sensor facing you (the part with the grid in front of you).
Apart from the power supply pins, the DHT11 has a single pin to transmit sensor data.
Wiring diagram for using the DHT11 module with an ESP32
If the module does not contain a pullup resistor, you must add one between 4.7kΩ (or 10kΩ ) between the pins 3V3 and the signal (GPIO17 ). You can always add one more; it won’t hurt.
Any output pin can be used. Here we use the pin GPIO17 . In the following diagrams, I use the DHT11 sensor from Elegoo; please make sure to adapt it to your model if it is slightly different. 🙂
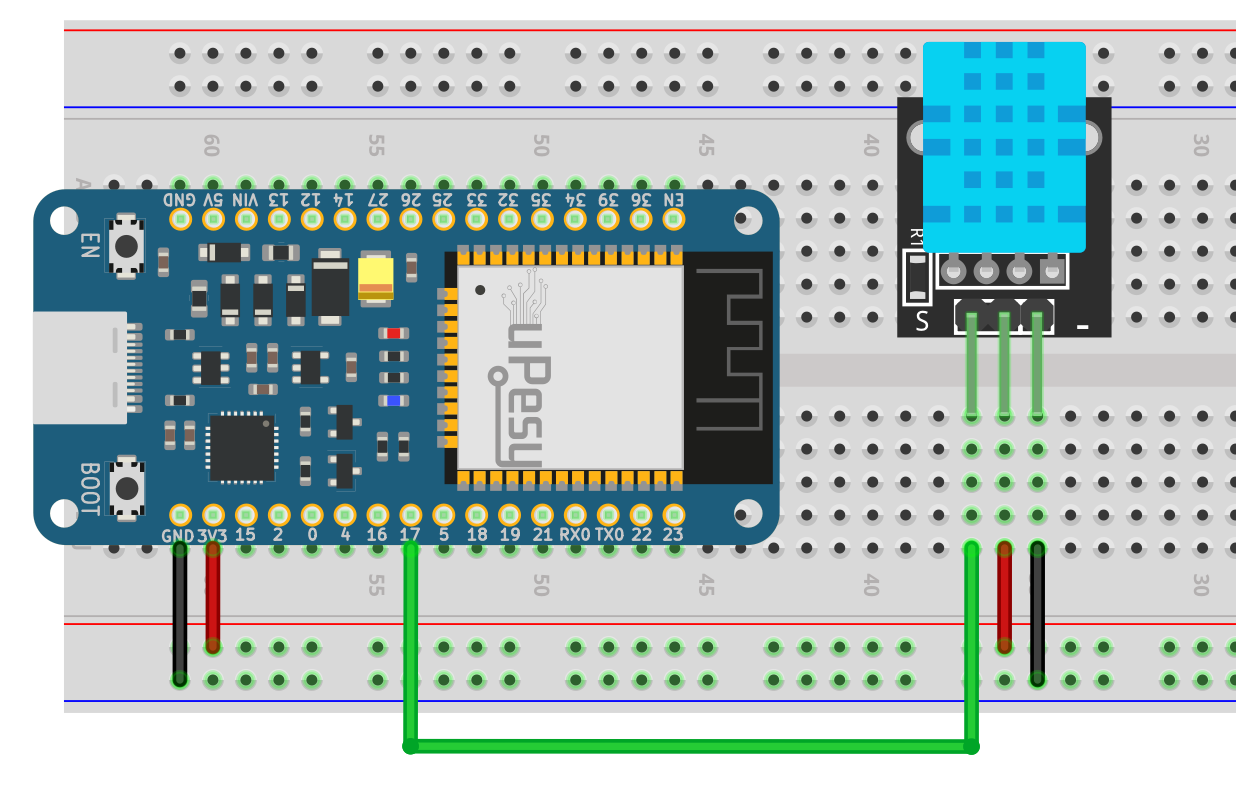
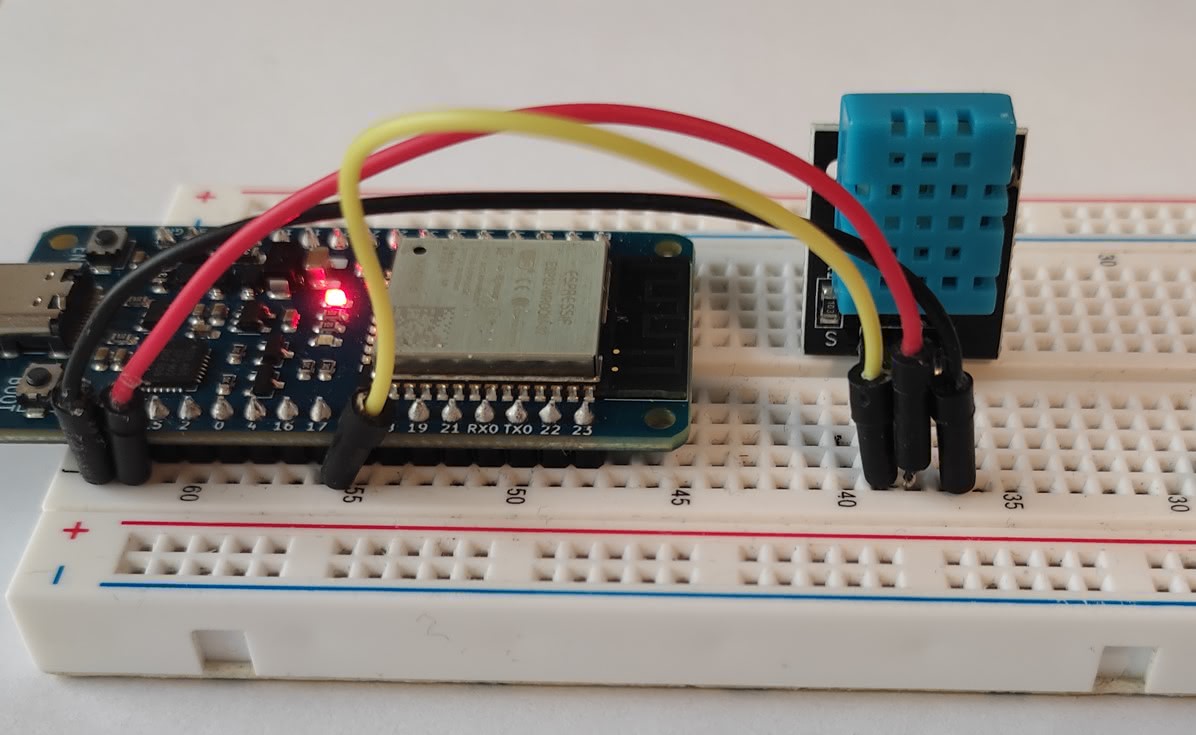
Wiring the DHT11 with a uPesy ESP32 Wroom DevKit on a breadboard
Warning
Make sure you supply the module with 3.3V and not 5V to have a 3.3V data signal.
Measuring the temperature and humidity of the DHT11 with Arduino code
Since the DHT11 uses a proprietary protocol, it is essential to use a library to communicate easily with the sensor. It would be best if you used adafruit’s DHT Sensor library, which works properly on the ESP32 .
Here is how to install it from the Arduino IDE :
Once the library is installed, we use the following code that retrieves the temperature and humidity of the DHT11.
#include "DHT.h"
#define DHTPIN 17
#define DHTTYPE DHT11
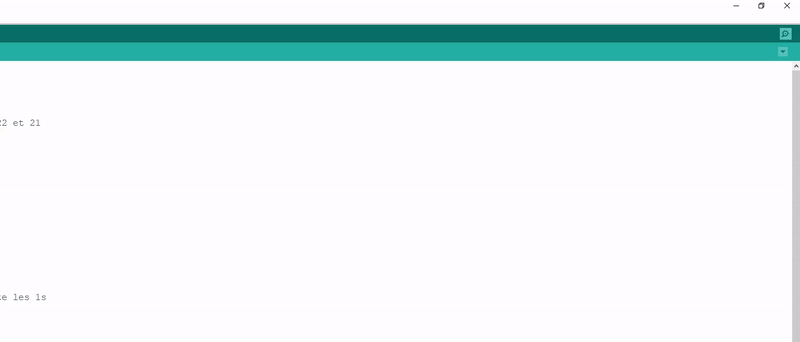
//DHTTYPE = DHT11, but there are also DHT22 and 21
DHT dht(DHTPIN, DHTTYPE); // constructor to declare our sensor
void setup() {
Serial.begin(115200);
dht.begin();
}
void loop() {
delay(1000);
// The DHT11 returns at most one measurement every 1s
float h = dht.readHumidity();
//Read the moisture content in %.
float t = dht.readTemperature();
//Read the temperature in degrees Celsius
float f = dht.readTemperature(true);
// true returns the temperature in Fahrenheit
if (isnan(h) || isnan(t) || isnan(f)) {
Serial.println("Failed reception");
return;
//Returns an error if the ESP32 does not receive any measurements
}
Serial.print("Humidite: ");
Serial.print(h);
Serial.print("% Temperature: ");
Serial.print(t);
Serial.print("°C, ");
Serial.print(f);
Serial.println("°F");
// Transmits the measurements received in the serial monitor
}
Note
The DHT.h at the beginning of the program includes the DHT Sensor library.
This is what you get in the console:
Note
You can blow on the DHT11 sensor like a cold window to clear the fog. You should see the humidity level skyrocket.
It is not possible to have more measurements per second. This sensor is not very suitable for quickly detecting a sudden temperature change.
Making asynchronous measurements with the DHT11 sensor
You will notice that the measurement is blocked: the ESP32 cannot do anything else during the measurements. An obvious solution is to replace the delay() with the function millis() in a condition if . But despite this, the exchange of data with the DHT11 will permanently be blocked: your program will be blocked by jerks
The best solution is to use a library that works with timers and interrupts so that the measurements are done in the background:
This section is available to premium members only. You still have 29% to discover.
Subscribe for only 5$/monthAlready subscribed? Sign in