
DHT22: Measuring temperature and humidity with the Raspberry Pi Pico in Arduino code
(Updated at 01/06/2023)
The DHT22 is the improved version of the popular low-cost temperature and humidity sensor, the DHT11, used in DIY projects. While it provides more accurate results, it operates similarly to its predecessor.
Warning
Even if the DHT22 is better than the DHT11, its main drawback remains the same: its low number of measurements per second: 0.5Hz, that is to say, 1 measurement every 2 seconds… It will, however, be perfectly suitable to make a DIY IoT weather station. 🙂
Getting started with the DHT22 sensor
The DHT22 is part of the DHTxx family. To understand the differences between the DHT11 and DHT22 sensors , a tutorial can be used to compare the two. The DTH22 has a white plastic case, while the DHT11 comes in a blue case. If your sensor has a blue case, you should refer to the DHT11 tutorial .
Note
The DHT22 is sometimes called AM2302.
Characteristics of the DHT22 sensor
The DHT22 can be supplied with 3.3V, the same voltage that the Raspberry Pi Pico operates on, simplifying the connection process.
Note
The DHT22 is ideal outdoors, as it can measure temperatures as low as -40°C. This makes it an excellent choice for applications like monitoring an IoT greenhouse. The DHT11 is less suited for this purpose.
The DHT22 sensor has basic performance and can be less dependable than the BMExxx sensors from Bosh. It all comes down to the purpose it is being used for.😉
Connections of the DHT22 sensor
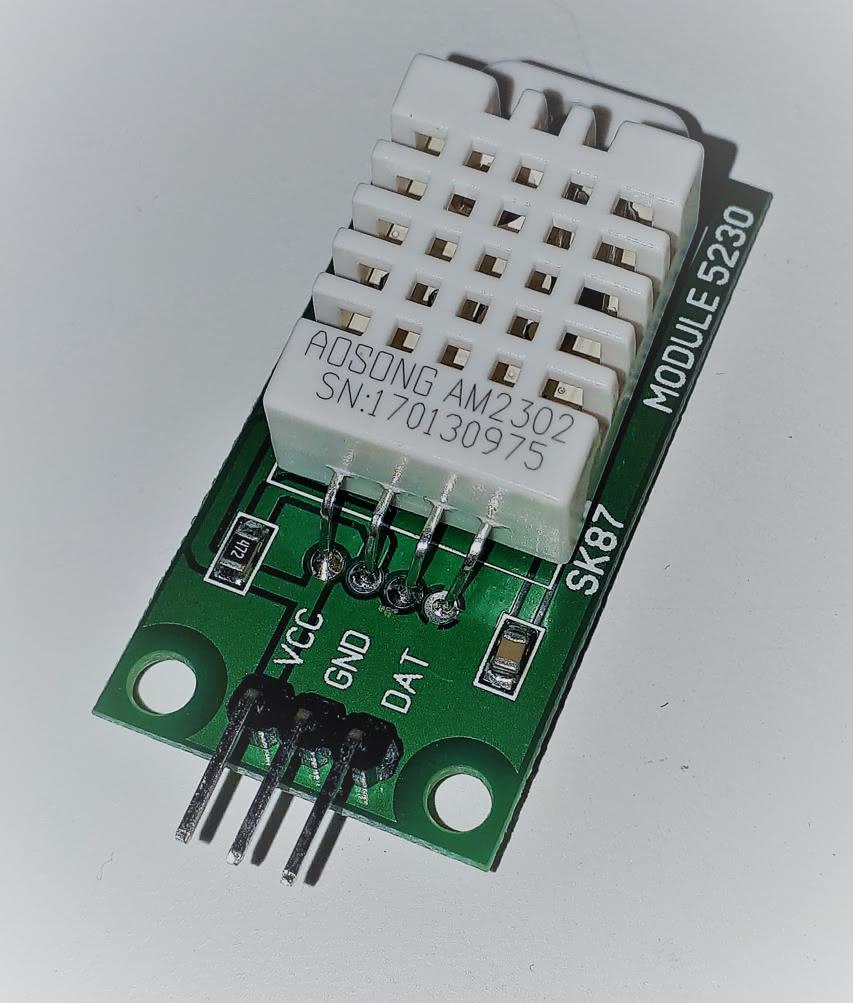
The DHT22 sensor has 3 or 4 pins, depending on your module. It has 4 pins, but one is not useful, so you’ll only find 3 exposed pins on the module. It is important to note that the pin-out of the DHT22 module can differ depending on the manufacturer.
When holding the sensor towards yourself (with the grid in front of you), the pins on the left side are numbered, beginning with the power supply pin, followed by other pins that may vary.
The DHT22 has one pin for data transmission apart from the power supply pins.
Wiring diagram for using the DHT22 module with an RPi Pi Pico
If your module does not already have a pull-up resistor installed, you will need to add one between the pins 3V3 and the signal (GP13 ). The resistor should have a resistance of between 4.7kΩ and 10kΩ. It is also safe to add an additional resistor if desired. 😉
It’s possible to use any output pin for your project. For the sake of example, GP13 will be used here. Depending on your model, you may need to adjust the circuit accordingly. 🙂

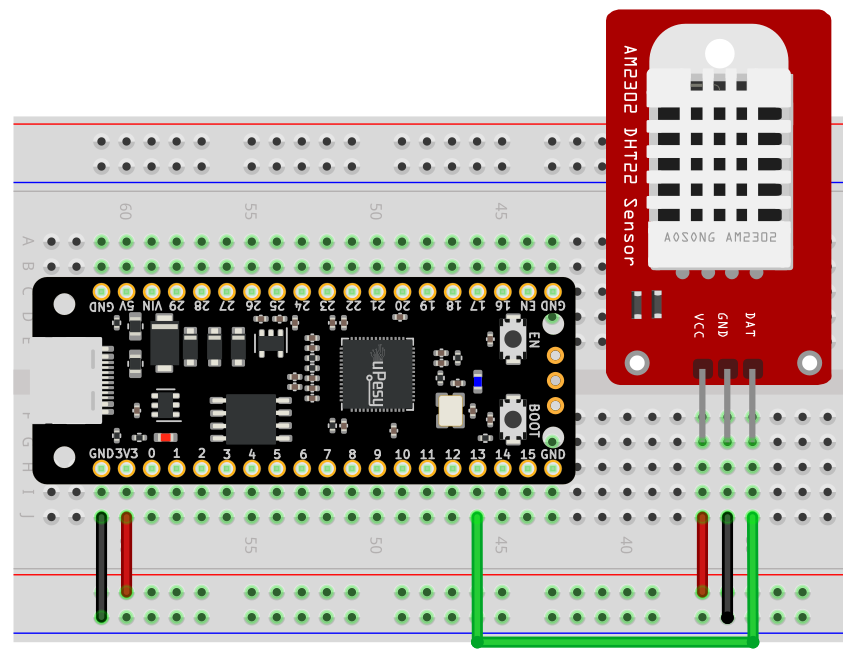
The uPesy RP2040 DevKit board, an upgrade from the Pico, is used in the following example with a DHT22 module with the signal on the far right:
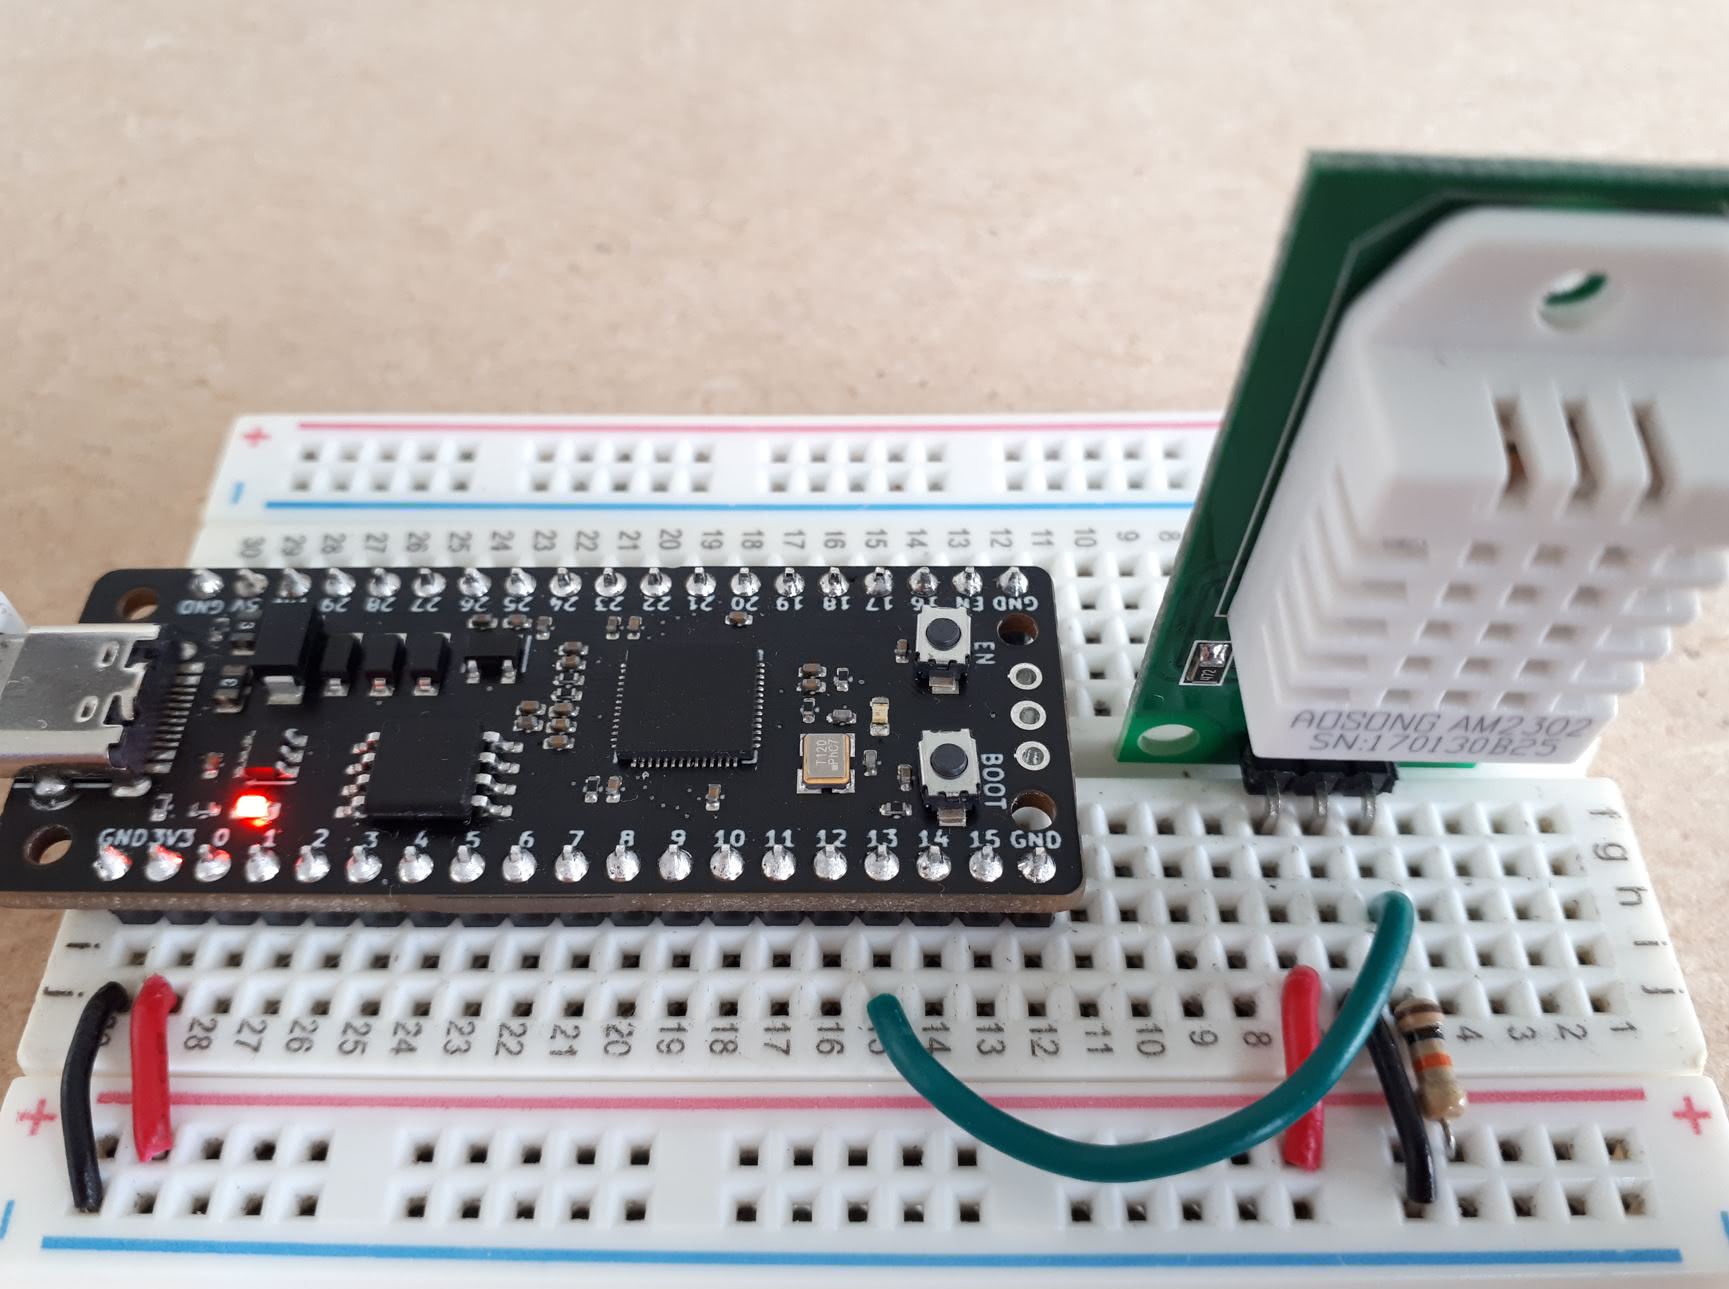
Warning
Supply the module with 3.3V and not 5V to have a 3.3V data signal.
Measuring the temperature and humidity on the DHT22 module with Arduino code
You’ll need to install a library to use the DHT22, a device that works with a unique protocol. A great option is the dHT Sensor library from Adafruit , which works with the Pi Pico.
Here is how to install it from the Arduino IDE :

Once the library is installed, we can use the following code to retrieve the temperature and humidity from the DHT22.
#include "DHT.h"

#define DHTPIN 13
#define DHTTYPE DHT22

DHT dht(DHTPIN, DHTTYPE);

void setup() {
  Serial.begin(115200);
  dht.begin();
}

void loop() {
  delay(2000);
  // The DHT22 returns at most 1 measurement every 2s
  float h = dht.readHumidity();
  // Reads the humidity in %
  float t = dht.readTemperature();
  // Reads the temperature in degrees Celsius
  float f = dht.readTemperature(true);
  // true returns the temperature in Fahrenheit

  if (isnan(h) || isnan(t) || isnan(f)) {
    Serial.println(F("Failed reception"));
    return;
    // Returns an error if the ESP32 does not receive any measurements
  }

  Serial.print("Humidite: ");
  Serial.print(h);
  Serial.print("%  Temperature: ");
  Serial.print(t);
  Serial.print("°C, ");
  Serial.print(f);
  Serial.println("°F");
  // Transmits the received measurements to the serial terminal
}
Note
The DHT Sensor Library can be included in the program by adding the DHT.h at the start.
This is what you get in the console:
Note
You can use your breath to test the DHT22 sensor, like blowing on a window covered in frost. If you do, you should observe a sudden spike in humidity.
Calculate the heat index | Felt air temperature
To determine the temperature felt, the heat index can be used. This is a numerical value in Celsius that considers the atmosphere’s temperature and moisture level. As the relative humidity is higher, the temperature felt will increase. The library has an in-built function to calculate the heat index - computeHeatIndex() -. Here is an example of how to display the temperature felt by using an Arduino sketch:
This section is available to premium members only. You still have 70% to discover.
Subscribe for only 5$/monthAlready subscribed? Sign in