
DHT11: Measuring temperature and humidity with the Pi Pico in MicroPython
(Updated at 01/05/2023)
The DHT11 sensor is a favorite among makers and DIY enthusiasts and is pre-installed in MicroPython. This sensor stands out because of its affordability and convenience.
Warning
Although it is straightforward, this tool is limited in speed, as it can only measure once per second.
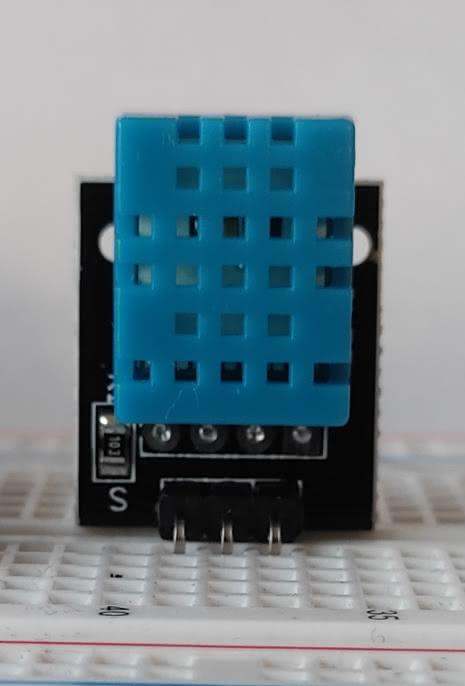
Getting started with the DHT11 sensor
The DHT22 is the more advanced model and is identifiable by its white case and slightly larger size than the DHT11, which has a blue case. The two models have the same user; however, if you want to explore the differences, you can check out the comparison between the DHT11 and the DHT22. If you are using the DHT22, you can follow the corresponding tutorial.
Some technical characteristics of the DHT11
It is possible to power the DHT11 directly from pin 3V3 of the Raspberry Pi Pico
If you’re looking for more accurate and consistent measurements, I recommend using a sensor from the Bosh BMExxx family. Though it may be more expensive, it’s worth the investment.
DHT11 Sensor Wiring on Raspberry Pi Pico
The DHT11 sensor has between 3 and 4 pins depending on the model. One pin is redundant if your module has 4. Unfortunately, the pin-out is different depending on the manufacturer. 😕
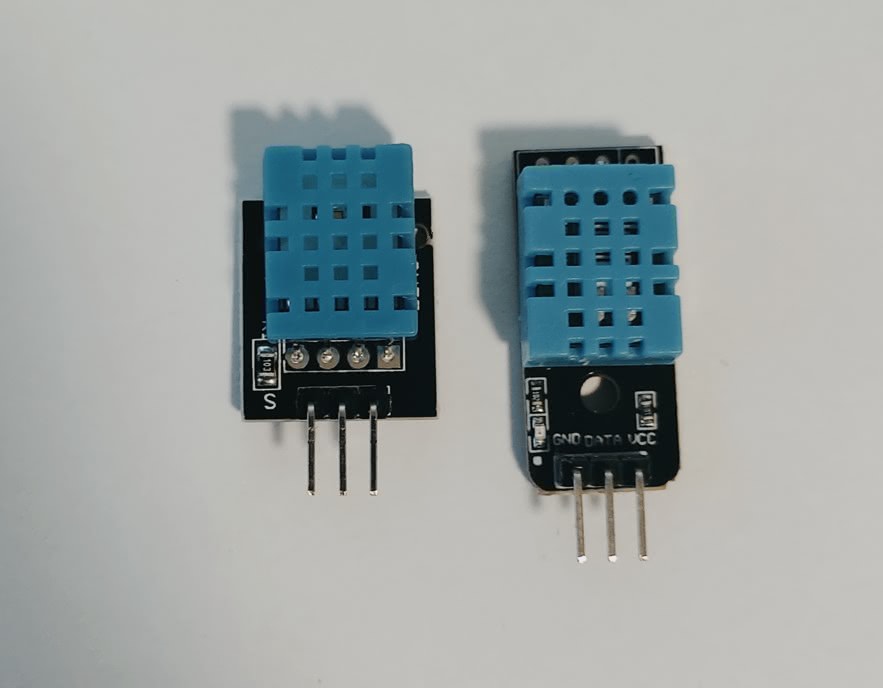
When the sensor is placed in front of you, the pins numbering will begin from the left side. Here is a brief overview of the available options:
In addition to the pins for providing power, the DHT11 also has one output pin to communicate the sensor readings.
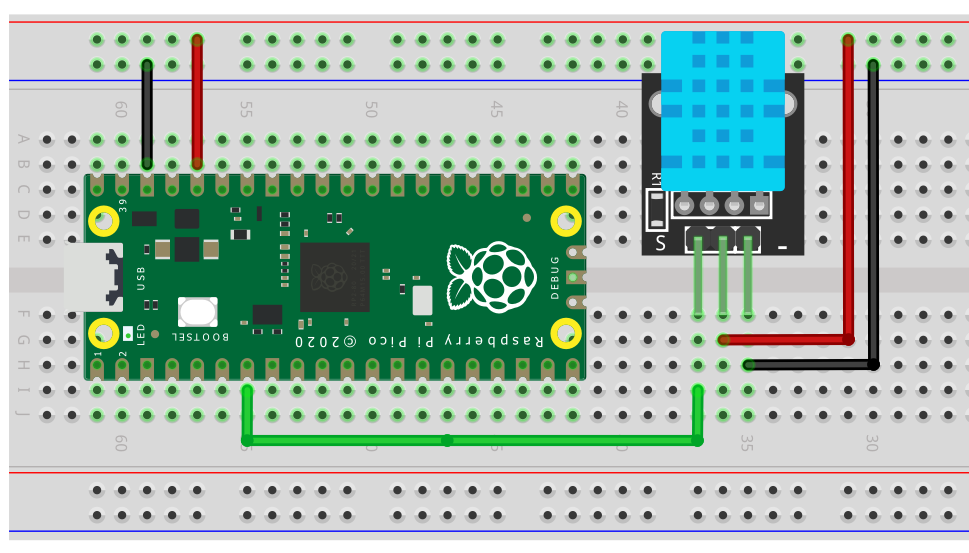
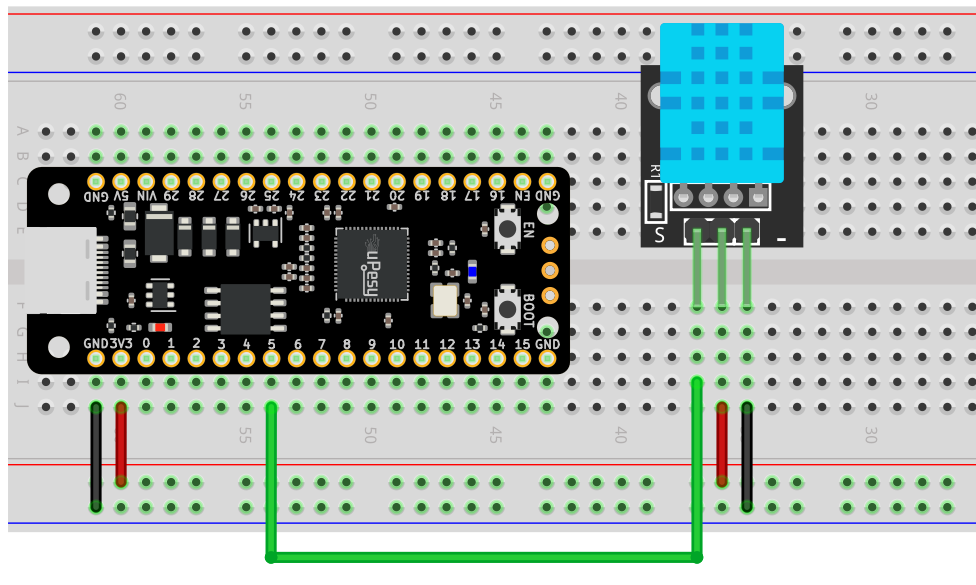
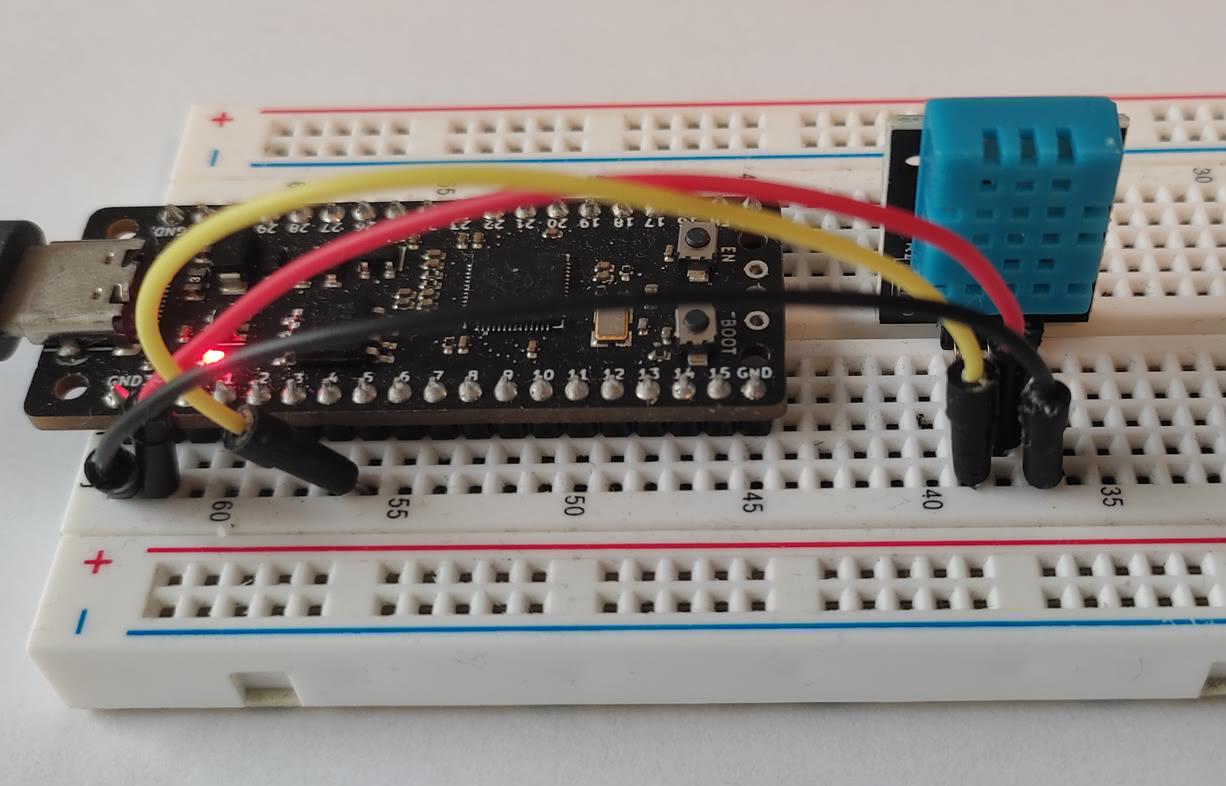
Electrical circuit to use the DHT11 module with a Raspberry Pi Pico
If your module has no pullup resistor installed, you must add one between the pins 3V3 and the signal (S ). The resistor should have a value between 4.7kΩ to 10kΩ. It won’t hurt to add a resistor if desired.
A pin with PWM capacity can be used for the output. We will use GP5 in this example. The sensor we will use is the Elegoo DHT11. Be sure to adjust the circuitry if you are using a different model. This module has a 10kΩ resistor, labeled as R1, on it (above the letter S ).
Measuring the temperature and humidity of the DHT11 with MicroPython
If you are a beginner, you might need help communicating with the DHT11 sensor as it uses a proprietary protocol. Luckily, the necessary library is included in recent versions of MicroPython, so you don’t have to download anything extra. The code is easy - create an object called dht using the PIN, then call the sensor.measure() function.
from machine import Pin
from time import sleep
import dht

sensor = dht.DHT11(Pin(5))

while True:
    try:
        sleep(1)
        # The DHT11 returns at most one measurement every 1s
        sensor.measure()
        # Retrieves measurements from the sensor
        print(f"Temperature : {sensor.temperature():.1f}")
        print(f"Humidity    : {sensor.humidity():.1f}")
        # Transmits the temperature to the terminal
    except OSError as e:
        print('Failed reception')
        # If the pico does not receive the measurements from the sensor
Note
Remember to add a 1-second delay between 2 measurements because the DHT11 cannot go faster.😮💨 If it is not able to keep up with the rate, an error will be returned and captured by the try: except:
In the Thonny IDE terminal, you will see the temperature expressed in °C and the humidity in percentage.
Note
You can blow on the DHT11 sensor like a cold window to clear the fog. You should then see the humidity level fluctuate.
In Python, an f-string can be used to display variables with text. An f must be placed at the beginning of the string, and the variable must be placed in square brackets. The number of digits after the decimal point can be specified with``:.1f`` . For the DHT11, we should use 0 as the sensor is accurate to one degree. For example, f"Humidite: {sensor.humidity():.1f}" .
Optimized library using the Pi Pico PIO
https://github.com/danjperron/PicoDHT22/blob/main/PicoDHT22.py
This section is available to premium members only. You still have -296% to discover.
Subscribe for only 5$/monthAlready subscribed? Sign in