
Using a servo motor with a Raspberry Pi Pico in Arduino code
(Updated at 01/20/2023)
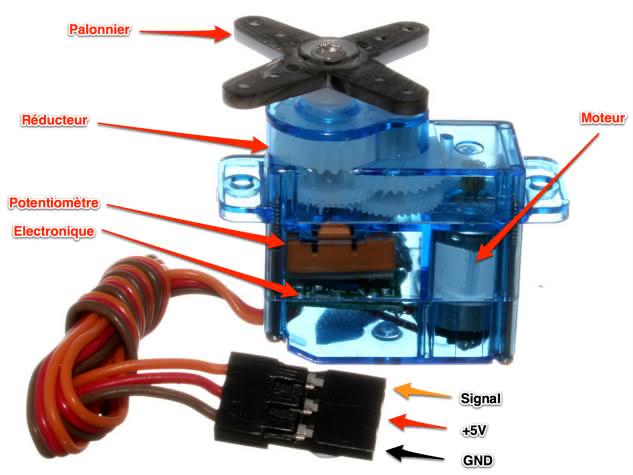
Servo motors, sometimes called “servos,” are motors capable of maintaining a specific angular position until given a new command. The TowerPro SG90, blue in color, is widely used due to its affordability and simplicity. It is often included in sensor kits.
The SG90 servomotor: an intelligent motor
This servomotor has a limited range of motion, rotating between 0 and +180 degrees. It contains gears to increase torque and a regulation system to set its range of motion, all within a small plastic housing.
Note
The potentiometer is the component of the control system that is utilized to guarantee a precise rotation limit. It enables the control system to maintain a specific position.
How to drive the SG90 servo?
The pulse width modulated (PWM) signal used to control this actuator has a frequency of 50 Hz, which means it sends a pulse every 20 milliseconds (ms). The pulse length can be adjusted from 1 to 2 ms to change the actuator’s position.

Note
The angle of the servo is determined by a PWM signal, which is interpreted and acted upon by the servo’s internal circuitry.
How do I power the servo motor on the Pi Pico?
The SG90 servo motor datasheet suggests providing 5V for optimal performance. It is also possible to run the motor using 3.3V, but it will not reach its full potential.
Note
For a more responsive servo, I recommend using 5V, even though the example may be with 3.3V.
Servo motors require a lot of power to move heavier objects. A USB port with a maximum current rating of 500mA powers the Raspberry Pi Pico. If you are only using one or two servo motors, the power from your USB power supply should be sufficient.
Using multiple servo motors requires a separate power supply. Be sure to link the board’s ground pin (GND ) to that of the external power supply. This ensures the grounds are connected.
Wiring the SG90 to a Raspberry Pi Pico board
An SG90 servo motor contains 3 wires: 2 for the power supply and 1 for the PWM control signal. The colors of the wires allow us to differentiate them:
RPi Pi Pico |
Wire color |
Servomotor SG90 |
|---|---|---|
|
Brown |
|
|
Red |
|
|
Orange |
Signal |
Note
Depending on the actuator model, the PWM wire may be yellow or white instead of the standard orange color.
The Raspberry Pi Pico’s output pins can be used to operate the actuator, with almost all of them capable of performing this function.
Circuit for driving a servo motor with a Pico
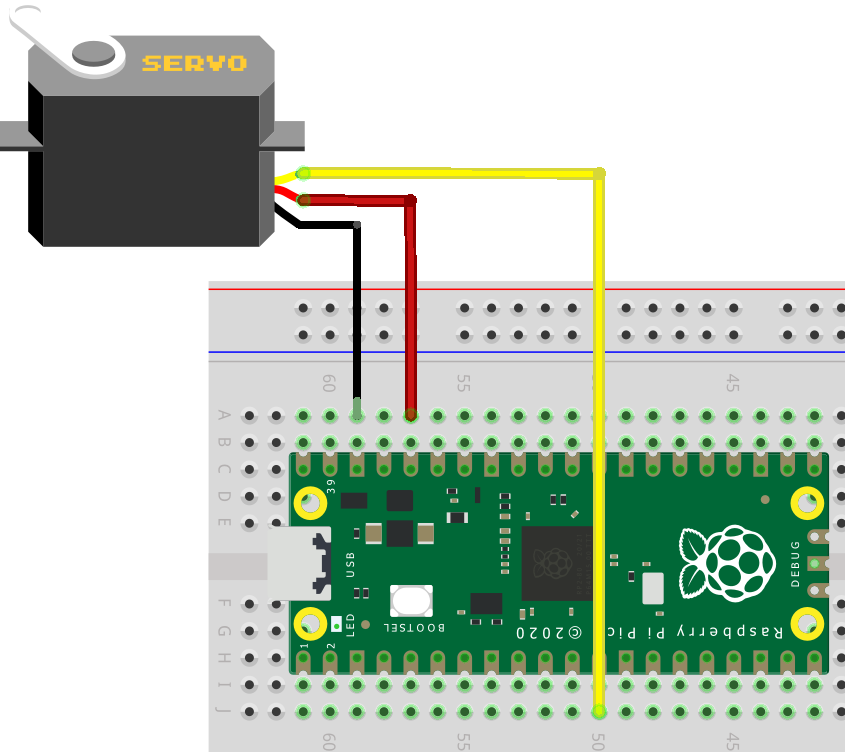

For those new to breadboarding, here is an example with the uPesy RP2040 DevKit board, an improved version of the Pi Pico board. The servo in the image is powered at 3.3V, but for best results, it is recommended to use 5V.
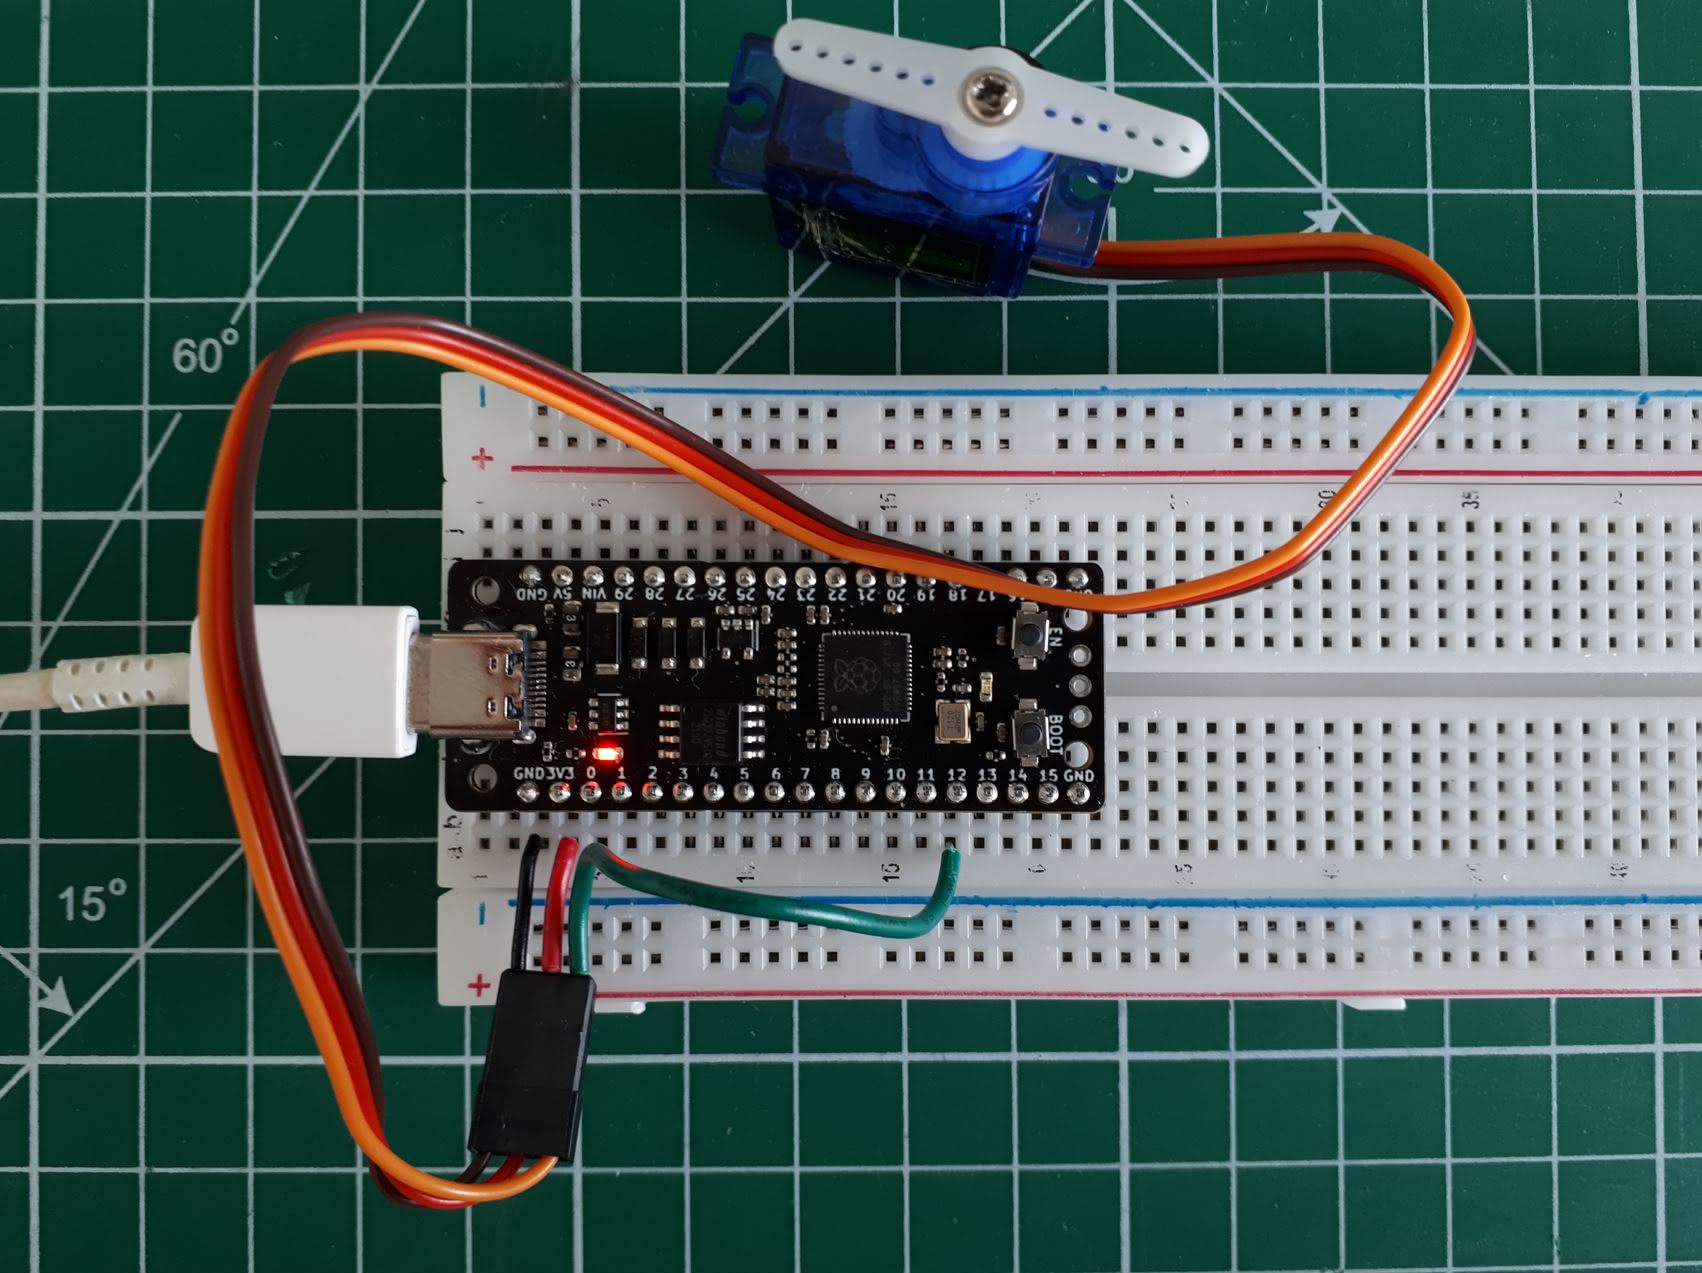
It’s more convenient with the uPesy version to see the pin numbering 😉
Drive a servo motor from the Pi Pico with Arduino code
Rather than taking the time and effort to control servo motors manually, why not take advantage of existing libraries? These libraries have been developed to help streamline the process, so it’s better to utilize them than to try and recreate the wheel.
The Servo.h library is a classic Arduino library; best of all, it is already included with the RP2040 port to Arduino code. This means that installing third-party libraries is not necessary. Any existing code for Arduino boards that utilize Servo.h can also be used for the RP2040 port.
Note
The Pi Pico features the Programmable Input/Output (PIO) library , enabling users to manage up to 8 motors simultaneously. Those interested in the technical details can find the low-level implementation on GitHub. 😉
Drive the servo with the library Servo.h in Arduino code
The following code can move the SG90 from 0° to 180° with the Pico.
#include <ESP32Servo.h>
#define PIN_SG90 22 // Output pin used

Servo sg90;

void setup() {
  sg90.setPeriodHertz(50); // PWM frequency for SG90
  sg90.attach(PIN_SG90, 600, 2400); // Minimum and maximum pulse width (in µs) to go from 0° to 180°.
}

void loop() {
 // Rotation from 0 to 180°.
  for (int pos = 0; pos <= 180; pos += 1) {
    sg90.write(pos);
    delay(10);
  }
 // Rotation from 180° to 0.
  for (int pos = 180; pos >= 0; pos -= 1) {
    sg90.write(pos);
    delay(10);
  }
}
Here is a demonstration video with the above code:
Controlling the SG90 servo with the uPesy RP2040 DevKit board
You may need to adjust the pulse width values in the sg90.attach(PIN_SG90, 500, 2400) if your actuator only rotates 90°. Here is a video that explains the bug you might come across.
The library for Arduino is identical to the one you’ll find elsewhere, but for more information, check out the official page . There you’ll find all the available options. 😉